Tapping into Efficiency: A Guide to Using a Tapener in Your Garden
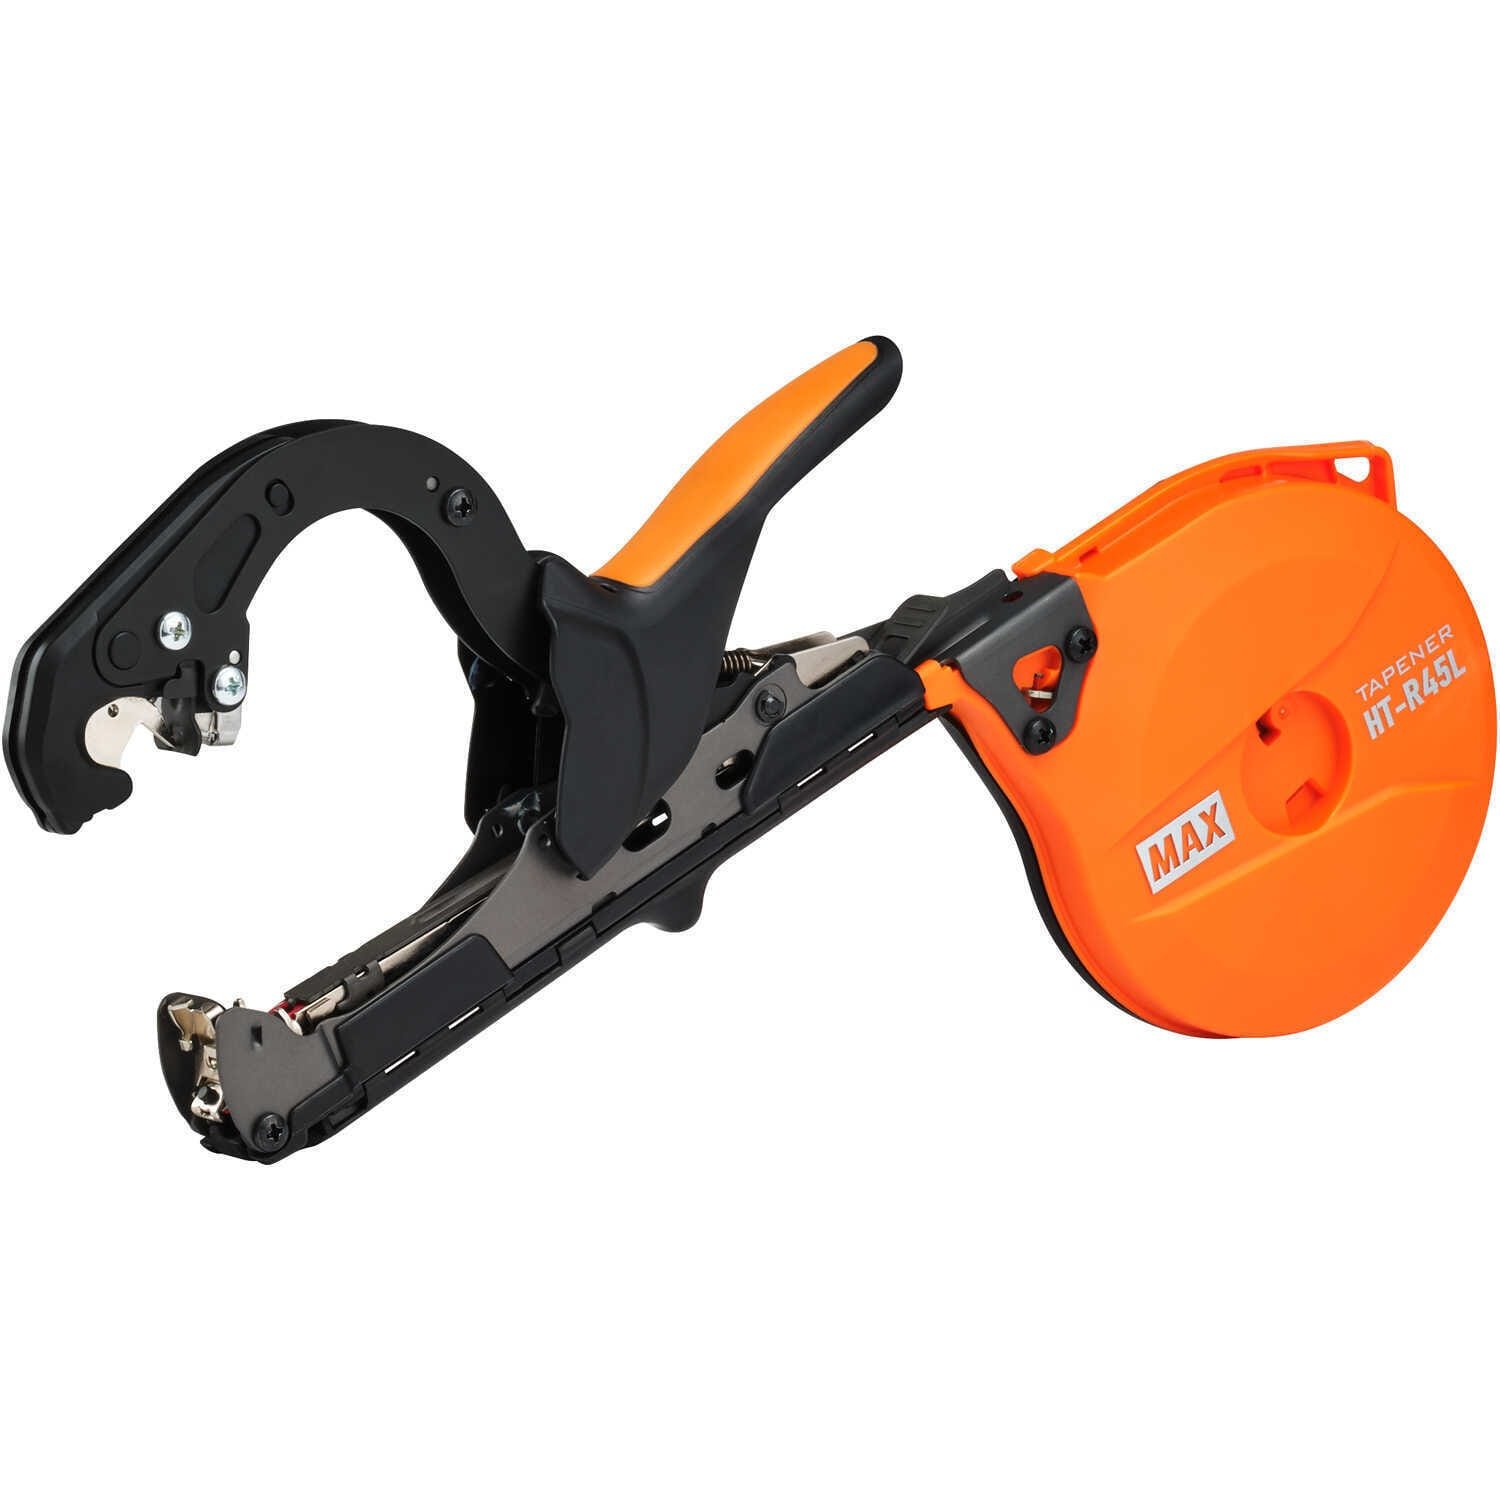
Hello green thumbs! Today, we’re talking about a tool that can revolutionize your gardening routine – the tapener. This handheld gadget may look somewhat peculiar, but it’s a game changer when it comes to fastening and supporting plants. If you’ve been manually tying plants with twine, the tapener can save you time and effort. Let’s dig in!
What is a Tapener?
A tapener, sometimes referred to as a plant tying tool or a plant tape binder, is a device designed to speed up the process of tying and supporting plants. It works a bit like a stapler, dispensing tape and staples (or ties) to secure your plants to stakes, trellises, or each other. The result? Neater, more secure plants, and a happier gardener!
Why Use a Tapener?
If you’re tending to a large garden or vineyard, tying plants manually can be a laborious task. The tapener can streamline this process, making it faster and less strenuous. But even for smaller gardens, the tapener is beneficial. It’s designed to tie plants securely but gently, reducing the risk of damage to your precious greenery.
How to Use a Tapener: Step by Step
- Load the Tape: Open the tapener, and place a roll of tape on the holder. Feed the end of the tape through the exit point, and close the tapener.
- Load the Staples: Depending on the type of tapener, you may need to load staples or ties. These are usually placed in a separate compartment.
- Position the Plant: Hold the stem of the plant against the support (like a stake or trellis) where you want to secure it. Position the tapener over the stem and support.
- Squeeze the Handle: Squeeze the tapener’s handle to dispense the tape and staple. The tape should wrap around the plant and support, and the staple will secure the tape.
- Release and Repeat: Release the handle, and the tapener will cut the tape, ready for the next tie. Simply repeat the process wherever you need to secure a plant.
Tips for Using a Tapener
- Preload Your Tape: Always preload your tapener before heading out to the garden to save valuable time during planting or pruning.
- Adjust Tension Appropriately: Set the tape tension according to the type and thickness of the plant you’re working with to prevent damage.
- Regular Cleaning: Periodically clean your tapener’s blade and tape guide area to ensure smooth operation and prolong its lifespan.
- Store Properly: Store your tapener in a dry, cool location to avoid rust and tape degradation.
Frequently Asked Questions (FAQs)
The tapener might seem like a small thing, but as any gardener knows, it’s the small things that make all the difference. Try integrating a tapener into your garden routine and watch as your garden becomes neater, and your gardening more efficient.
That’s all for now, folks. Stay tuned for more gardening tips and tools that can make your life easier. Happy gardening!

