Unearth the Secrets of Your Garden: The Ultimate Guide to Soil Testing
Unlock the full potential of your garden with our comprehensive guide to soil testing. Discover step-by-step instructions, expert tips, and the importance of knowing your soil’s pH and nutrient levels.
Introduction
Every gardener dreams of a flourishing garden, filled with robust plants, vibrant flowers, and bountiful harvests. But the true foundation of any successful garden is its soil. Understanding your soil’s nutrient makeup and pH level is crucial for plant health and optimal growth. That’s where soil testing comes into play. This ultimate guide will walk you through the why, when, and how of soil testing, equipping you with the knowledge you need to take your garden to the next level.
The Importance of Soil Testing
Soil testing is more than just a garden chore; it’s a diagnostic tool that provides valuable insights into your soil’s health. Knowing your soil’s pH level and nutrient content helps you make informed decisions, from selecting the right plants to adding the correct fertilizers or soil amendments. Here are some key benefits:
- Optimize Plant Growth: Plants have different nutrient and pH preferences. A soil test guides you in creating the perfect soil conditions for each plant type.
- Avoid Over-fertilization: Excess fertilization is not only a waste of resources but can also harm your plants and the environment. Soil tests help tailor your fertilization strategy.
- Prevent Nutrient Deficiencies: Soil tests reveal which nutrients are lacking, allowing you to address the issue before it affects your plants.
When to Test Your Soil
- Spring or Fall: These seasons are ideal because the soil’s pH and nutrient levels are more stable.
- Before a New Planting Project: Conduct a test before starting a new garden, installing a lawn, or planting trees and shrubs.
- Every 2-3 Years: Regular testing every few years helps monitor the soil’s health over time.
How to Conduct a Soil Test
Gather Supplies
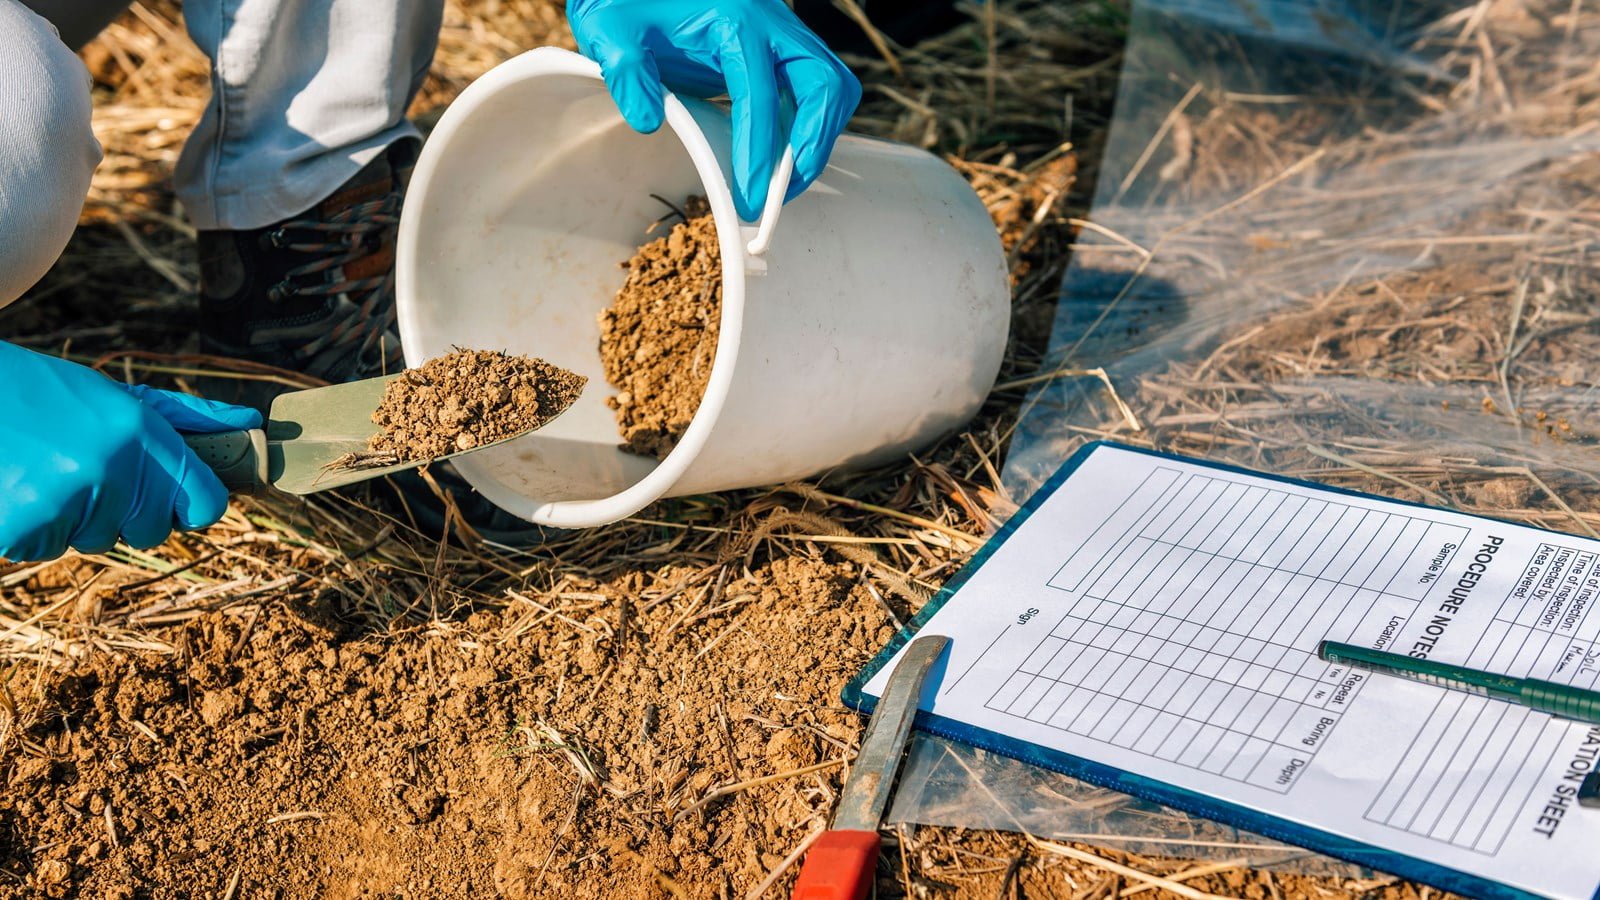
- Soil test kit or pH meter
- Trowel or spade
- Clean bucket
- Gloves
Steps
- Select the Test Area: Identify different zones in your garden, such as flower beds, vegetable gardens, and lawns. Test each zone separately.
- Collect the Sample:
- Use a clean trowel to dig a small hole about 4-6 inches deep.
- Take a soil sample from the side of the hole and place it in the bucket.
- Repeat this process in different parts of the test area, mixing all the samples in the bucket.
- Prepare the Sample:
- Remove any debris like leaves or stones.
- Allow the soil to dry if it’s damp.
- Perform the Test: Follow the instructions on your soil test kit or pH meter.
- Interpret the Results: Your soil could be acidic (low pH), neutral, or alkaline (high pH). Nutrient levels will typically be measured for elements like nitrogen, phosphorus, and potassium.
How to Amend Your Soil Based on Test Results
- Acidic Soil: Add lime to raise the pH.
- Alkaline Soil: Incorporate sulfur or aluminum sulfate to lower the pH.
- Nutrient Deficiencies: Use specific fertilizers to address lacking nutrients.
Conclusion
Understanding your soil is the first step towards a thriving garden. Soil testing empowers you with the information you need to create optimal growing conditions for your plants. Don’t leave your garden’s success to chance; make soil testing a regular part of your gardening routine.


