Growing Collard Greens: A Gardener’s Guide to a Southern Staple
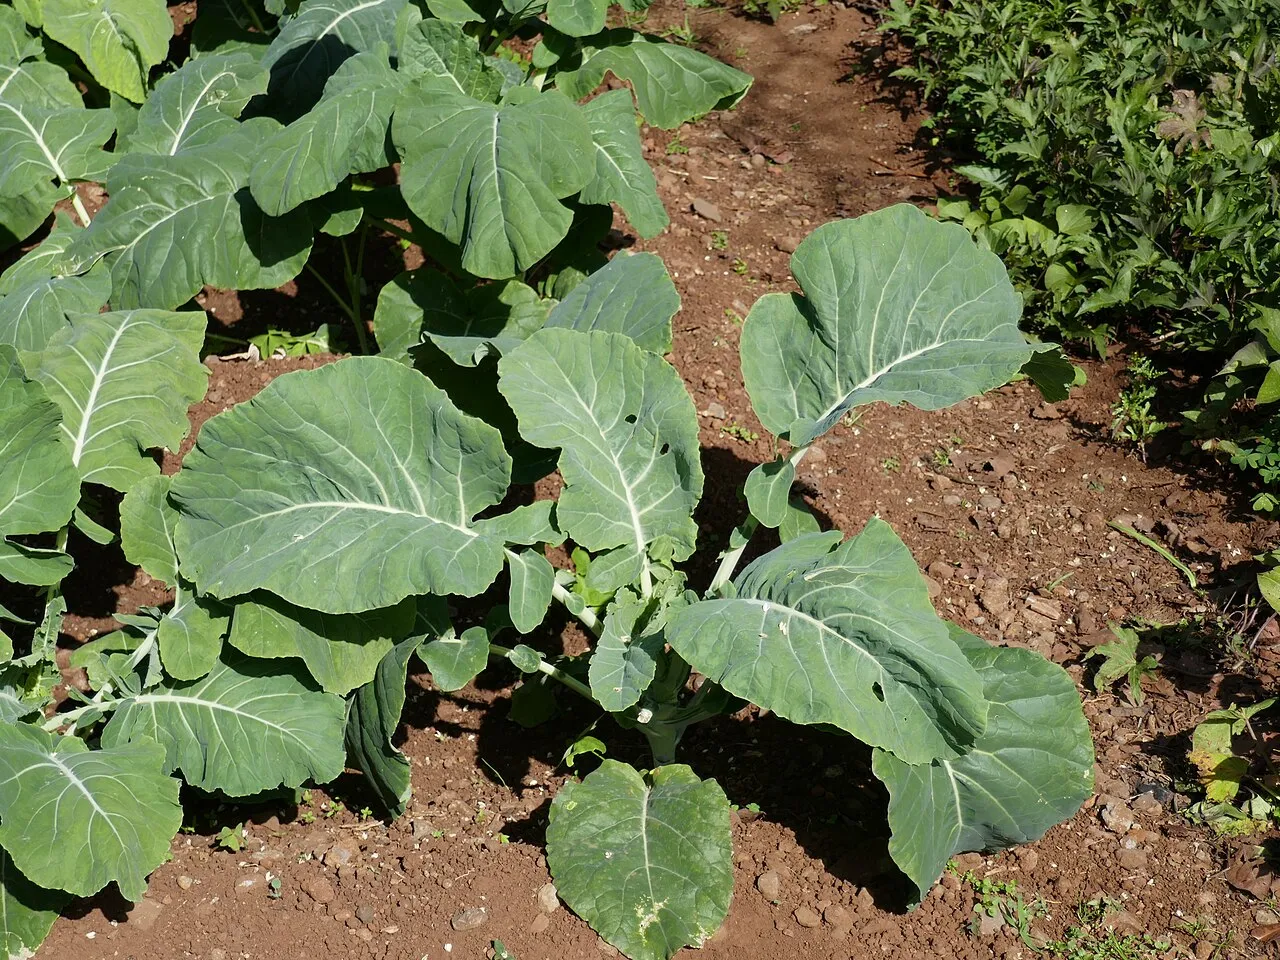
Collard greens, a member of the Brassica family, are a staple in Southern cuisine but have gained popularity across the globe for their nutritional benefits and culinary versatility. Known for their large, dark green leaves and slightly bitter taste, collards are rich in vitamins A, C, K, and calcium. This guide will walk you through the process of growing collard greens, from selecting the right variety to harvesting your crop.
Why Grow Collard Greens?
Collard greens are not only nutritious but also remarkably easy to grow. They’re cold-hardy, making them an excellent choice for fall and winter gardens, and can even improve in flavor after a frost. Growing collard greens provides a continuous harvest of vitamin-packed greens that can be used in a wide variety of dishes.
How to Grow Collard Greens
Choosing Collard Green Varieties
There are several varieties of collard greens, each with unique characteristics. Some popular varieties include:
- ‘Georgia Southern’: An heirloom variety known for its tolerance to heat and cold.
- ‘Vates’: A compact, slow-bolting variety that’s ideal for smaller gardens.
- ‘Champion’: Offers large, dark blue-green leaves with a mild flavor and excellent cold resistance.
Planting Collard Greens
- When to Plant: For a fall harvest, plant collard greens in late summer. In warmer climates, collards can also be planted in early spring for a late spring harvest.
- Soil and Site: Collards prefer full sun and fertile, well-drained soil with a pH of 6.0 to 6.8. Work compost or aged manure into the soil before planting to enrich it.
- Sowing Seeds: Sow seeds 1/4 to 1/2 inch deep, spacing them 2 inches apart in rows that are 18-24 inches apart. Thin seedlings to 12-18 inches apart once they’re a few inches tall.
Caring for Collard Greens
- Watering: Keep the soil consistently moist but not waterlogged. Collards require about 1 to 1.5 inches of water per week, whether from rainfall or irrigation.
- Mulching: Apply a layer of organic mulch around plants to retain soil moisture, regulate soil temperature, and suppress weeds.
- Feeding: Use a balanced, all-purpose fertilizer a few weeks after planting, then side-dress with a nitrogen-rich fertilizer midway through the growing season to encourage lush leaf growth.
Pest and Disease Management
Collard greens are susceptible to pests like aphids, cabbage worms, and diseases such as downy mildew and black rot. Practice crop rotation, use floating row covers to protect young plants, and remove any diseased plant material promptly. Neem oil or insecticidal soap can be effective against aphids.
Harvesting Collard Greens
Collard greens can be harvested when the leaves are large enough to use, typically about 60-75 days after planting. Harvest the outer leaves first, allowing the center to continue producing new leaves for a continuous harvest. Collards taste best after a light frost, which sweetens their flavor.
Enjoying Your Harvest
Collard greens can be used fresh in salads, sautéed, steamed, or added to soups and stews. Their sturdy leaves also make them ideal for low-carb wraps.
Conclusion
Growing collard greens is a rewarding endeavor for any gardener. With their nutritional benefits, cold-hardiness, and delicious taste, collards are a versatile green that can be enjoyed throughout the cooler months. Follow this guide to enjoy a bountiful harvest of collard greens from your garden.

